Home Gym
I can’t say that I hate going to the gym, but it can be a frustrating experience at times. With family and work, coordinating times I have available with times the gym is open and not packed is a real challenge. Yeah, they say you have to find a way to make time but the path of least resistance usually wins out in the long run!
So with that in mind, I set out recently to create my own home gym in the basement. I see a few advantages to this:
- Work out anytime, based on my schedule
- Music and TV to my liking
- Less expensive in the long run
I looked at a bunch of stuff on-line, and found a couple racks that weren’t ridiculously expensive. Multi-purpose stations though were more than I wanted to spend. There’s also a ton of stuff on CL, but from what I saw most of it was lightweight junk that didn’t look like it would last very long. Ultimately, I ended up building my own stuff in stages.
Weights & Bench
Dick’s Sporting Goods has a great weight set plus barbell for $209, which I bought. I also got an Adidas Flat Bench off Amazon, and it’s worked great! Play it Again Sports is where I got dumbbells and some additional weight plates. They also have the same basic weight set as Dick’s, for roughly the same price. New weights are expensive! If you automate CL monitoring with something like IFTTT, you could probably get weights cheaper there but it might take some waiting.
One issue I ran into with the weights is that the smallest increment is 2.5 pounds, which means 5 lbs. is the smallest increase you can make. Play it Again Sports had this whole milk carton full of used collars, and it turns out they weight just over a pound. So buy 2 of those and you’ll be able to go up in ~2 lb increments!
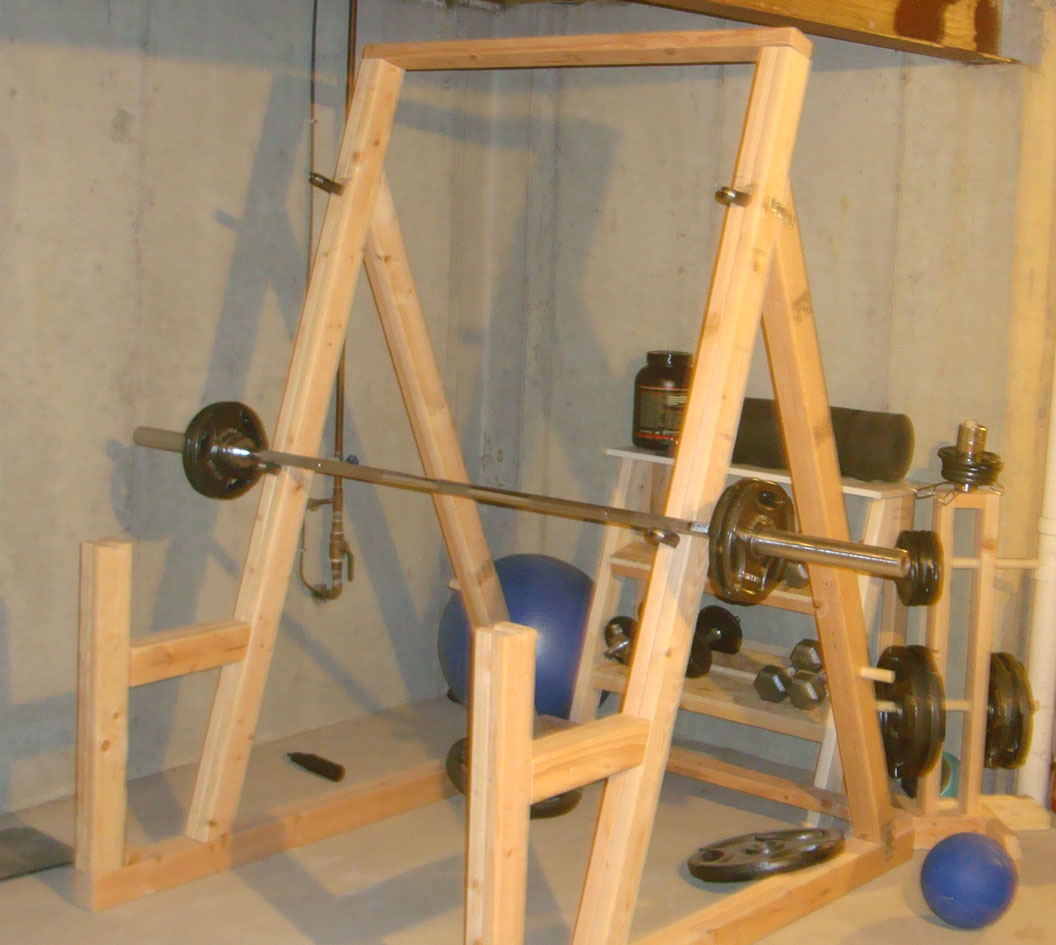
Squat Rack
All I was really targeting was a power rack and bench. Dick’s Sporting Goods has a solid half-rack for $349 which appears to get good reviews.
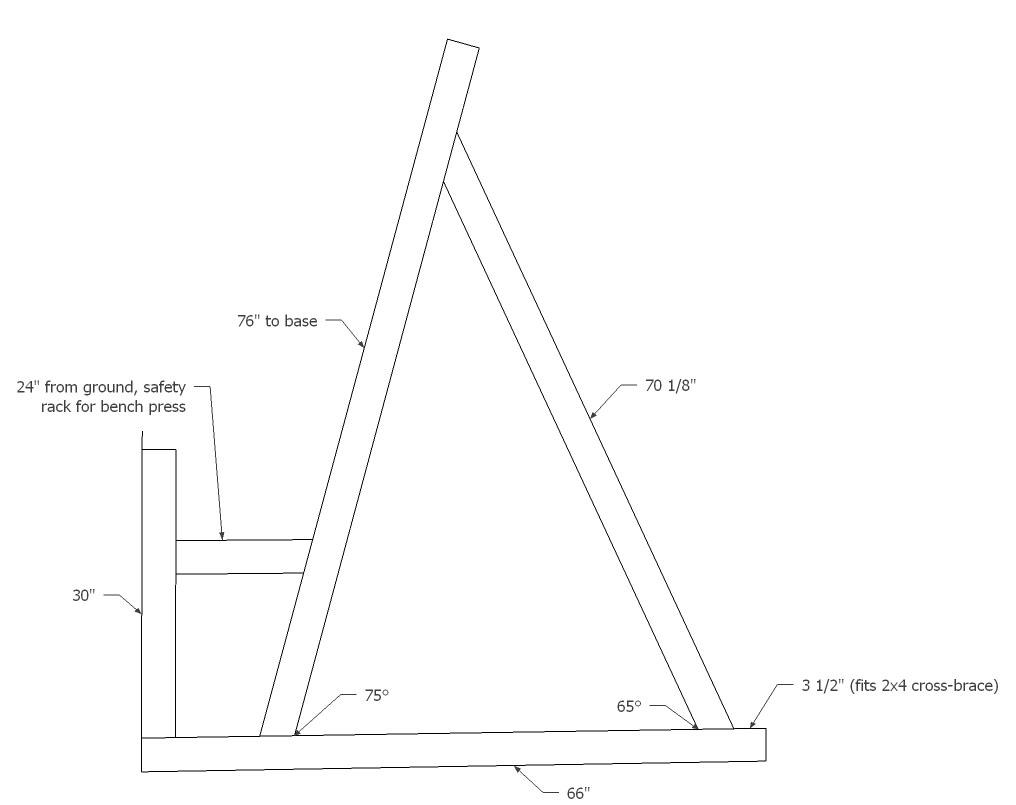
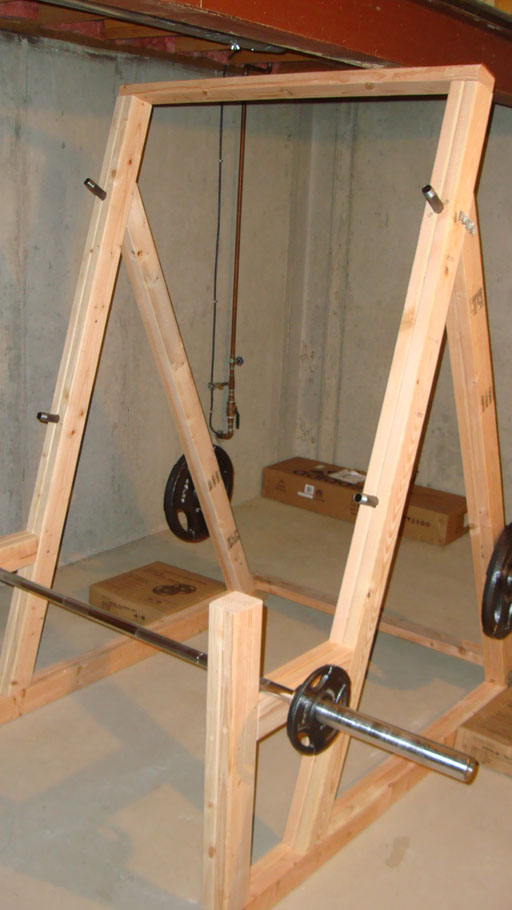
I was looking for really cheap though, which is how I ran across this plan for a DIY squat rack made out of 2x4s. The only issue I had with those plans is they seem to be geared toward someone that’s much shorter than I am. So I made some tweaks, which you can see below, and ended up building this thing in just a weekend really. Here’s how I built it plus lessons learned, along with a SketchUp diagram plus pics of the real deal.
How I built it
- I sandwiched the 2x4s at full length, using Gorilla Glue plus 2″ screws every 2-3′ then let dry for 24 hours.
- Cut all my pieces to spec with a mitre saw (biggest cut angle is 50°)
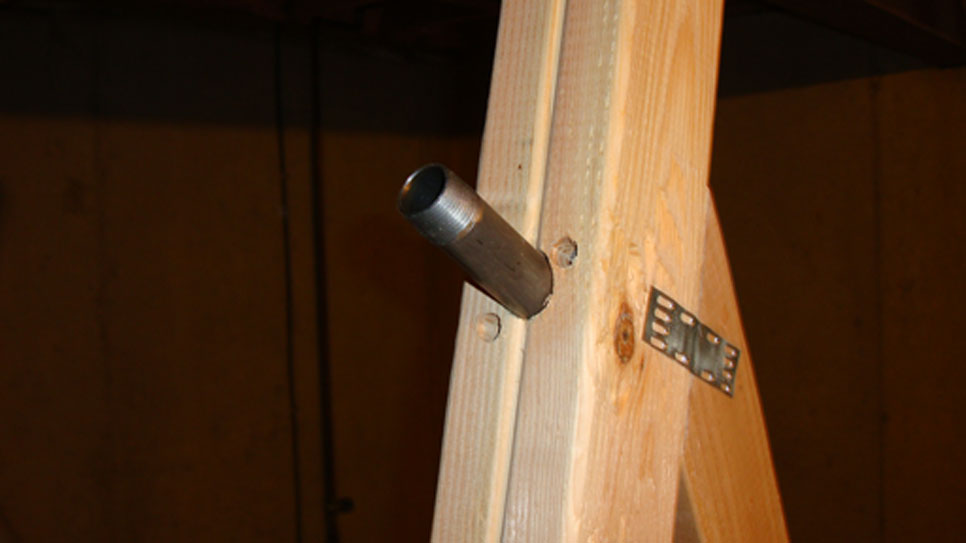
- Used 4″ deck screws to marry everything up, ended up pre-drilling 1″ holes about 1.5″ deep. Without those, I found it impossible to get everything flush and feeling sturdy.
- Used truss connectors at the joints, to improve stability
- Ran a 2×4 across the base at the very back and another one across the very top, 48.5″ outside-to-outside.
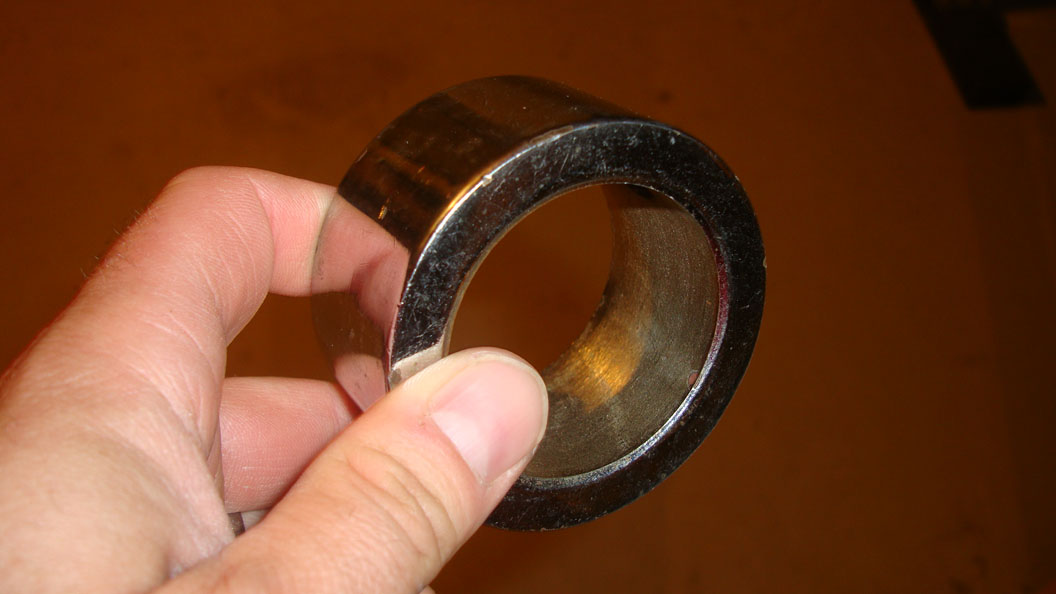
- Drilled 1 1/8″ holes for 3/4″ pipe couplers as shown. They fit comfortably but not so snug that you can’t remove them. I bought 2 sets of couplers, but you could save $5 and just move the couplers from squat to bench if you had to.
Lessons Learned
- Considered plywood cross-brace as shown in the original plans but a 4×8 sheet is a huge PIA to transport and it’s very stable without that so saved my money.
- I got lucky that I made the tallest piece as tall as I did, it’s just tall enough that I could run that 2×4 across the top to stabilize. If you run it just a little longer, then you’ll have plenty of clearance for that cross-brace and then you don’t need the plywood.
- 48.5″ is about as wide as you can go without requiring precision in setting the bar down but it’s a bit too narrow for bench press. I’m making do for now, but not quite perfect. The best alternative would be to bench off of the front uprights, but making those taller might hinder presses and the like.
- I put short 1 1/8″ dowel rods on the back end and using them for 45 lbs weights to keep everything grounded. I don’t think that’s a requirement, but not using the 45s a lot right now so not a big deal to keep them on there.
- [UPDATE] I ended up putting a V-shaped notch into each of the upright beams in the front, after a few months of use. Resting the bar there is easier for some exercises (e.g. military press) versus having to step in and rest it in the bench press area.
 |
|
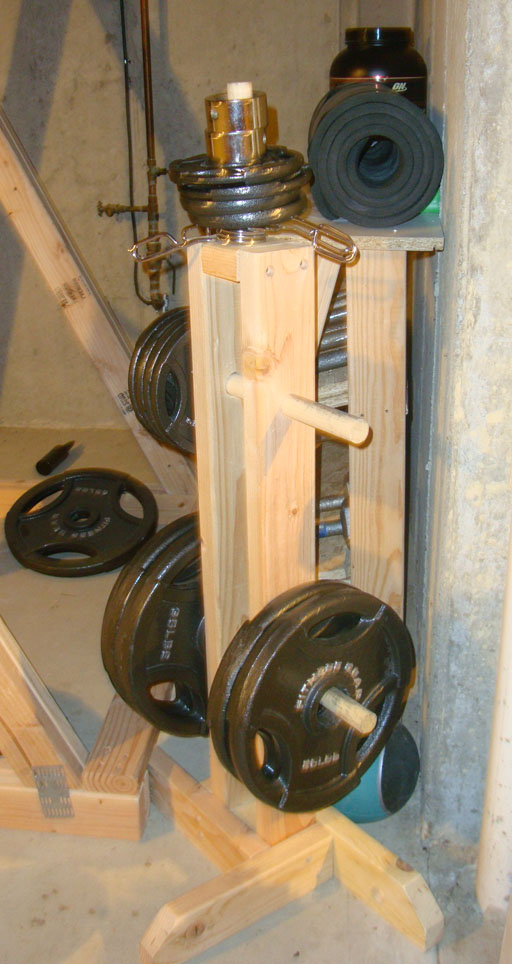
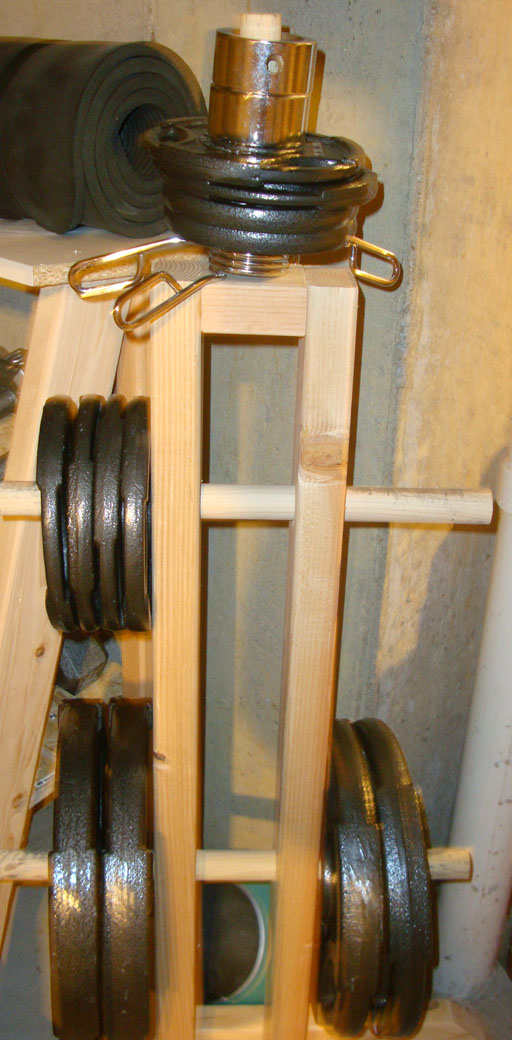
Weight Tree
Pretty quickly after I had the squat rack working I realized that I’d need a weight tree of some sort, to make storing and using plates easier. I looked at a ton of options online, and finally settled on this wooden weight tree idea (with some modifications). It’s pretty simple to build, so no SketchUp diagrams.
The version I linked to has diagrams and a great walk-through, if you need detailed help.
 |
 |
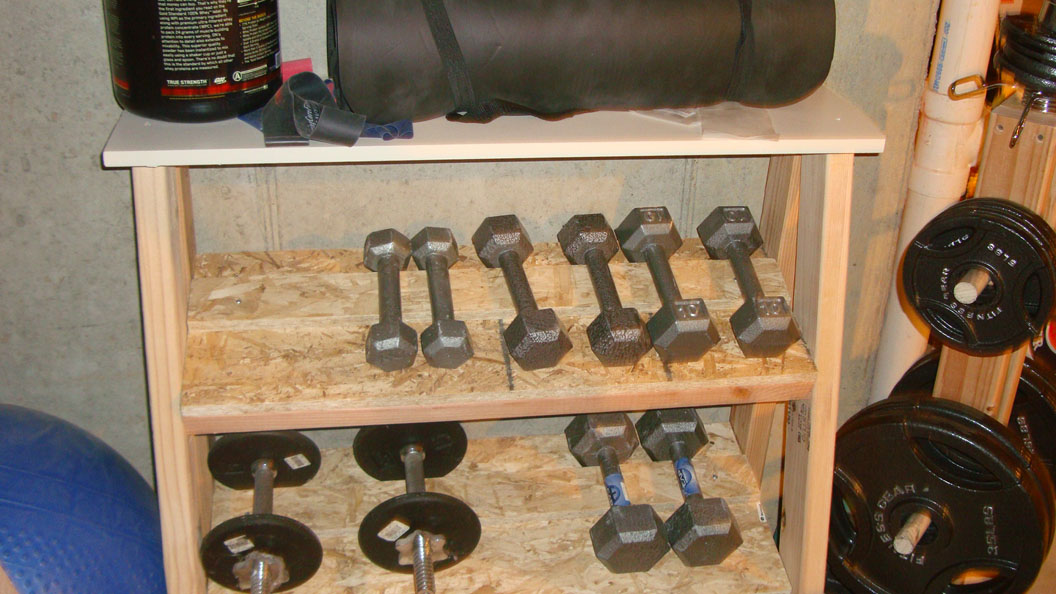
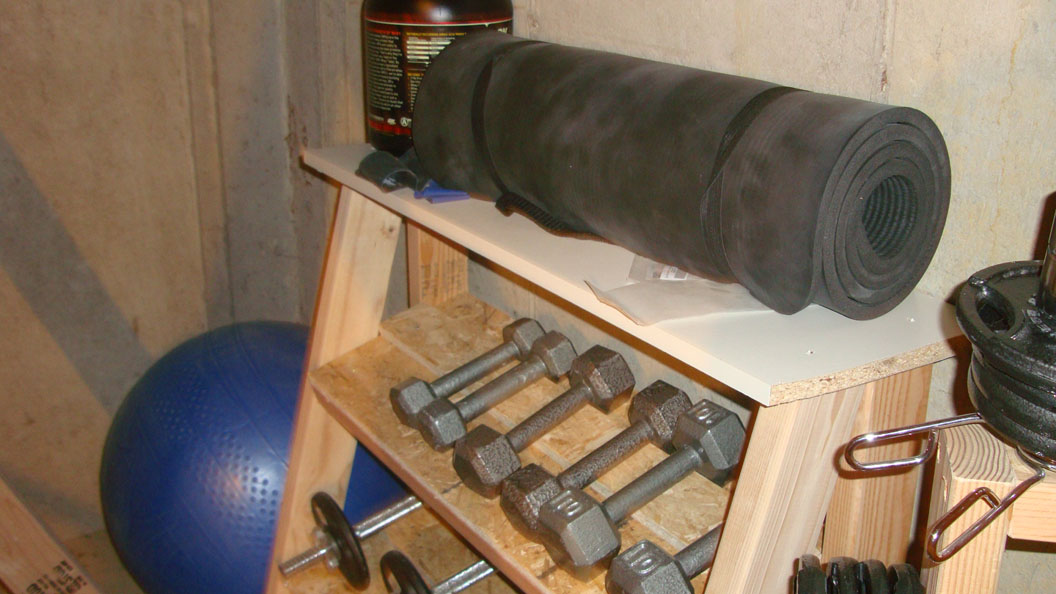
Dumbbell Rack
By early 2015 I had built up a small collection of dumbbells, in addition to plates, and it seemed a good time to build a rack for those! Again, I checked out a bunch of options online but found very few wooden versions.
I started to do a SketchUp diagram, but was spending too much time fiddling with all of the intersecting joints and planes so gave up on that. I just winged it!
- Top shelf is from an Ikea bookshelf that fell apart way too soon.
- Top rack is 11″ deep, with the raised board set 3″ from the back.
- Bottom rack is 13″ deep, with the raised board set 3.5″ from the back.
- I used 3/4″ sub-flooring board (cheapest plywood I could find) for the racks.
- I used 2×4’s to mount the racks, probably overkill but don’t want it to fail on me.
 |
 |